Copyright © 2024 Stephen Winter. All rights reserved.
1. The Creative Process SCULPTING SOLAR GRAVITY
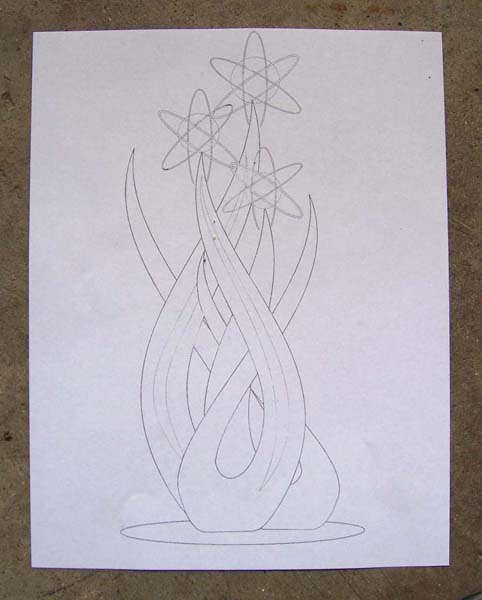
1. This is the concept of the sculpture on paper; a drawing completed using Corel Draw on computer. This illustration shows the original color scheme idea using purple to green House of Kolor brand color shift paint.
2. House of Kolor, purple to green color shape sample; the curves help show the color shifting of the paint.
3. Although I liked the dramatic look of the purple to green. I changed my mind about color choice to stay close to the idea of this sculpture. The idea being that the fabric of the green earth is being drawn up by the gravitational pull of the Sun. I choose a green to gold color shift paint from Kustom Shop instead. Due to the extremely high cost of this type of paint I chose to purchase just dry pigment and mix the paint myself. For example the House of Kolor purple to green costs about $319 for a pint mixed ready to spray. I was going to need 2 quarts to get the job done. Plus primer, primer sealer and a black base coat, and top it all off with 4 coats of a catalyzed clear coat. This would be a labor intensive, very expensive but spectacular paint job. So I saved some money mixing it myself.
4. The work begins with drawing the size of the sculptures circular base on the shop floor and dividing it in half for reference. The paper in the picture is a line drawing of the sculpture. The yardstick is to help you get a sense of scale. The circle is 34”in diameter. That’s an angle grinder and a length of 1.5” channel steel which will be used in the construction of this sculpture. The angle grinder will be fitted with a 4.5”cut-off wheel to cut the steel to length.
5. A line drawing on hand to use as a guide.
6. Where you can see the holes in the straight channel is the location I intend to weld 1”long x 3/8” diameter grade 8 bolts. I will use 6 bolts to attach each of the upright shapes to the base. Nuts and washers will be installed from the bottom. All of the upright shapes will remain removable for transportation or storage of the sculpture upon completion.
7. The first couple of pieces are welded.
8. My first variation from the concept drawing is incorporating an S shape for the bases as opposed to the straight base illustrated in the drawing. I decided this would eliminate any potential rocking at the base. I would also add a welded bolt to the far ends of the S shape for a more secure hold down. This base is about 30”long; all three bases are different lengths.
9. The three base pieces are laid into the circle to get an idea of placement.
10. Here I’m starting to bend and shape and weld the 3/8”cold rolled steel rod into the shapes that I need. This 3/8” cold rolled steel rod is extremely strong and ridged it can’t be bent and shaped in your bare hands loose. I used a home made bender that I originally made to build the Tin Man. Even though this was rod instead of a sheet like I used on the Tin Man the bender worked very well.
11. This is the first complete sculptural shape welded. The welds will have to be ground smooth before I can apply the sheet metal to both sides of the 3/8” rod and across the channel steel base.
If you have a question or comment please click on the E-mail link below:


